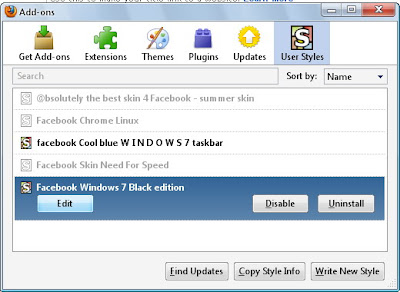
1. First, make sure that your browser is Mozilla Firefox and you have installed the Styler Add-On.
2. Make sure you have installed and apply one of facebook layout/style. In this tutorial we'll use Facebook Windows 7 Black Edition.
3. Go to your facebook page
4. Find picture / wallpaper on your computer, and decide what picture you want to be used for your facebook background, and then open the image with your browser.
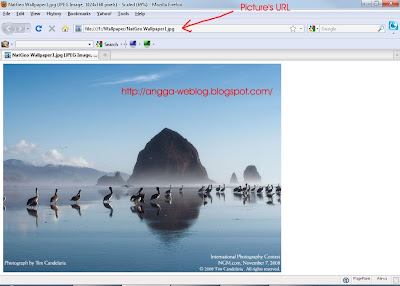
For example, here I choose a National Geographic Wallpaper and open it with my browser:

Take a look on the address bar, you'll see the picture's url (location address). As alternative, you can also put your picture in image hosting or your server.
5. Copy the picture's url
6. Now, back to your facebook page.
7. Open the "style manager". Click on the "S" symbol on the bottom right of your browser window - then choose "manage styles..."

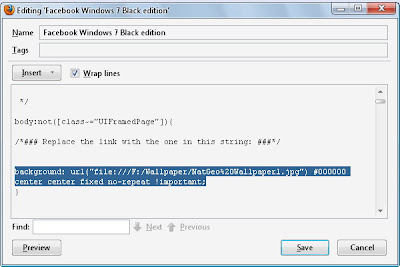
8. Select "Facebook Windows 7 Black Edition" and then click "Edit"
9. Find the default background url, it would be something like this:
background: url("http://img9.imageshack.us/img9/3729/windows7qs.jpg") #000000 top left fixed no-repeat !important;
10. Change the default background URL (http://img9.imageshack.us/img9/3729/windows7qs.jpg) with your picture's URL (ie. file:///F:/Wallpaper/NatGeo%20Wallpaper1.jpg).
11. To make the wallpaper fit in your browser window, make sure you change the image alignment, top with center, and left with center
So, after you changed the style, the result will be like this :
background: url("file:///F:/Wallpaper/NatGeo%20Wallpaper1.jpg") #000000 center center fixed no-repeat !important;

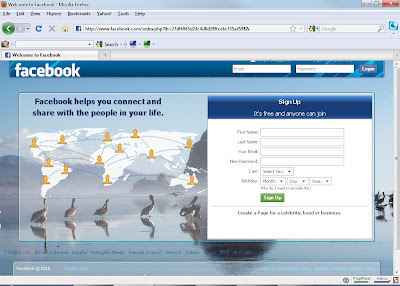
12. Click preview to see changes and save to apply the changes to your facebook style.

Done! Now you have successfully changed your facebook background with your own picture.
No comments:
Post a Comment